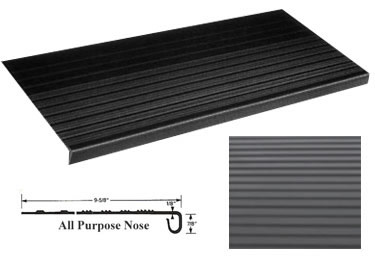
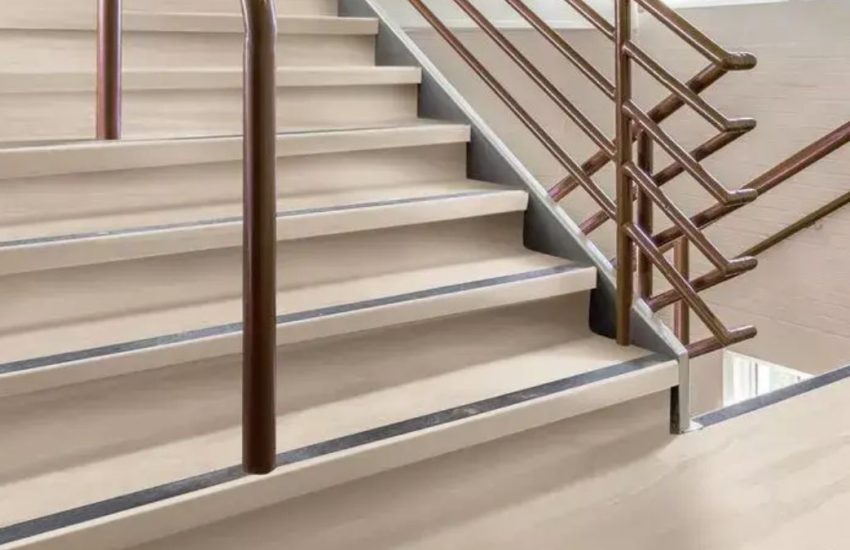
Stairs are an essential component of any home or building, providing access to different levels while adding architectural interest. However, over time, stair treads and risers can wear out, become damaged, or simply lose their aesthetic appeal. When this happens, it’s crucial to consider replacing them not only for safety reasons but also to enhance the overall look of your staircase. In this blog post, we’ll explore the importance of replacing stair treads and risers and provide helpful tips for a successful renovation project.
Why Replace Stair Treads and Risers?
Safety
Worn-out or damaged stair treads and risers pose a significant safety hazard, increasing the risk of slips, trips, and falls. By replacing them, you can ensure that your staircase is safe for everyone in your household or building, reducing the likelihood of accidents and injuries.
Aesthetic Appeal
Staircases are often a focal point in homes and commercial spaces, contributing to the overall aesthetic appeal of the interior. Old or outdated stair treads and risers can detract from the beauty of your staircase and make the entire space look tired and uninviting. Replacing them with new, stylish materials can instantly transform the look of your stairs and enhance the visual appeal of your home or building.
Structural Integrity
Stair treads and risers play a crucial role in the structural integrity of a staircase. Over time, they may become weak or deteriorate, compromising the stability of the stairs. By replacing worn-out components with high-quality materials, you can ensure that your staircase remains strong and durable for years to come.
Tips for Replacing Stair Treads and Risers

Assess the Condition
Before starting the replacement process, carefully inspect the existing stair treads and risers to determine their condition. Look for signs of wear, damage, or rotting, and make note of any areas that require attention.
Choose the Right Materials
When selecting new stair treads and risers, consider both safety and aesthetics. Opt for materials that are durable, slip-resistant, and easy to maintain, specifically rubber, hardwood, laminate, or vinyl. Additionally, choose colors and finishes that complement the overall design scheme of your home or building.
Measure Accurately
Proper measurements are crucial for ensuring a precise fit when replacing stair treads and risers. Measure the dimensions of each step carefully, taking into account any irregularities or variations in size. Double-check your measurements before purchasing materials to avoid costly mistakes.
Follow Installation Guidelines: Whether you choose to DIY or hire a professional contractor, it’s essential to follow the manufacturer’s installation guidelines carefully. Take the time to prepare the staircase properly, remove any existing treads and risers, and install the new components securely to ensure long-lasting results.
How To Install Stair Treads And Risers
Installation Video: Everything You Need to Know About Stair Treads
If you are more of a visual learner, we recommend watching our video on installing stair treads, stringers, and risers. We focus on scribing techniques, adhesive selection, and the use of epoxy caulking for secure installation. We also emphasizes the importance of preparing the substrate, measuring precisely, and acclimating products to reduce slip hazards and ensure a durable, safe finish.
People often inquire about the installation of stair treads and risers, and the process is not complicated. While it is a straightforward task, there are specific details to consider, depending on the type of stairs and the materials used. Wooden stairs, being common in many houses, will be the focus of our discussion.
Step 1: Prepare Tools and Materials
To start the installation, gather essential tools and materials a day before, including a level, tape measure, pencil, chop saw, belt sander, orbital sander, table saw, small diameter nails, elastomeric, and, crucially, treads and risers. Clear grip tape, known for user-friendliness, is preferred by consumers and differs from black grip tape in its composition. Ensure precision during work to avoid any mess. Now, let’s delve into the step-by-step process.
Step 2: Determine the Rise and Fall
Analyze and evaluate the stairs to determine the rise and fall. Use a level to measure the flatness and evenness of the tread or riser. Shim and adjust the angles to 90 degrees.
Step 3: Measure and Cut
In the third step, employ a plywood base for the tread, measuring its length accurately to prevent inconveniences. Mark a point on the tread during this process.
Measure the step from the opposite wall to the same point and add both lengths to get the tread’s total length. Apply the same process to calculate the riser’s length. Cut the tread and risers according to these measurements.
Step 4: Stand The Tread and Riser
Stand the tread and riser using belt sanders in the fourth step. Repeat these steps for each subsequent stair step, allowing the stairs to dry afterward.
Once the installation is complete, clean the stairs and remove any wood leftovers.
Now, having gained insight into how to install stair treads and risers, remember two crucial points:
- Avoid forcing the treads and risers into place, as it may result in temporary fixes with eventual gaps.
- Secure the stairs properly at the end using elastomeric and small diameter nails for a lasting and secure installation.
Replacing stair treads and risers is an important maintenance task that can improve safety, enhance aesthetics, and prolong the lifespan of your staircase. By investing in high-quality materials and following proper installation techniques, you can transform your stairs into a beautiful and functional feature of your home or building. For added durability and a cleaner edge finish, many installers also choose to include metal stair nose trim, especially in high-traffic or modern-style staircases.
Whether you’re tackling a DIY project or seeking professional assistance, the results will be well worth the effort, providing you with a safer, more stylish staircase for years to come
